Cosplay: Weathering armor to look bloody is easy if you follow these tips
Want to make your cosplay look like it's been through war and back? Check out this blood weathering tutorial!
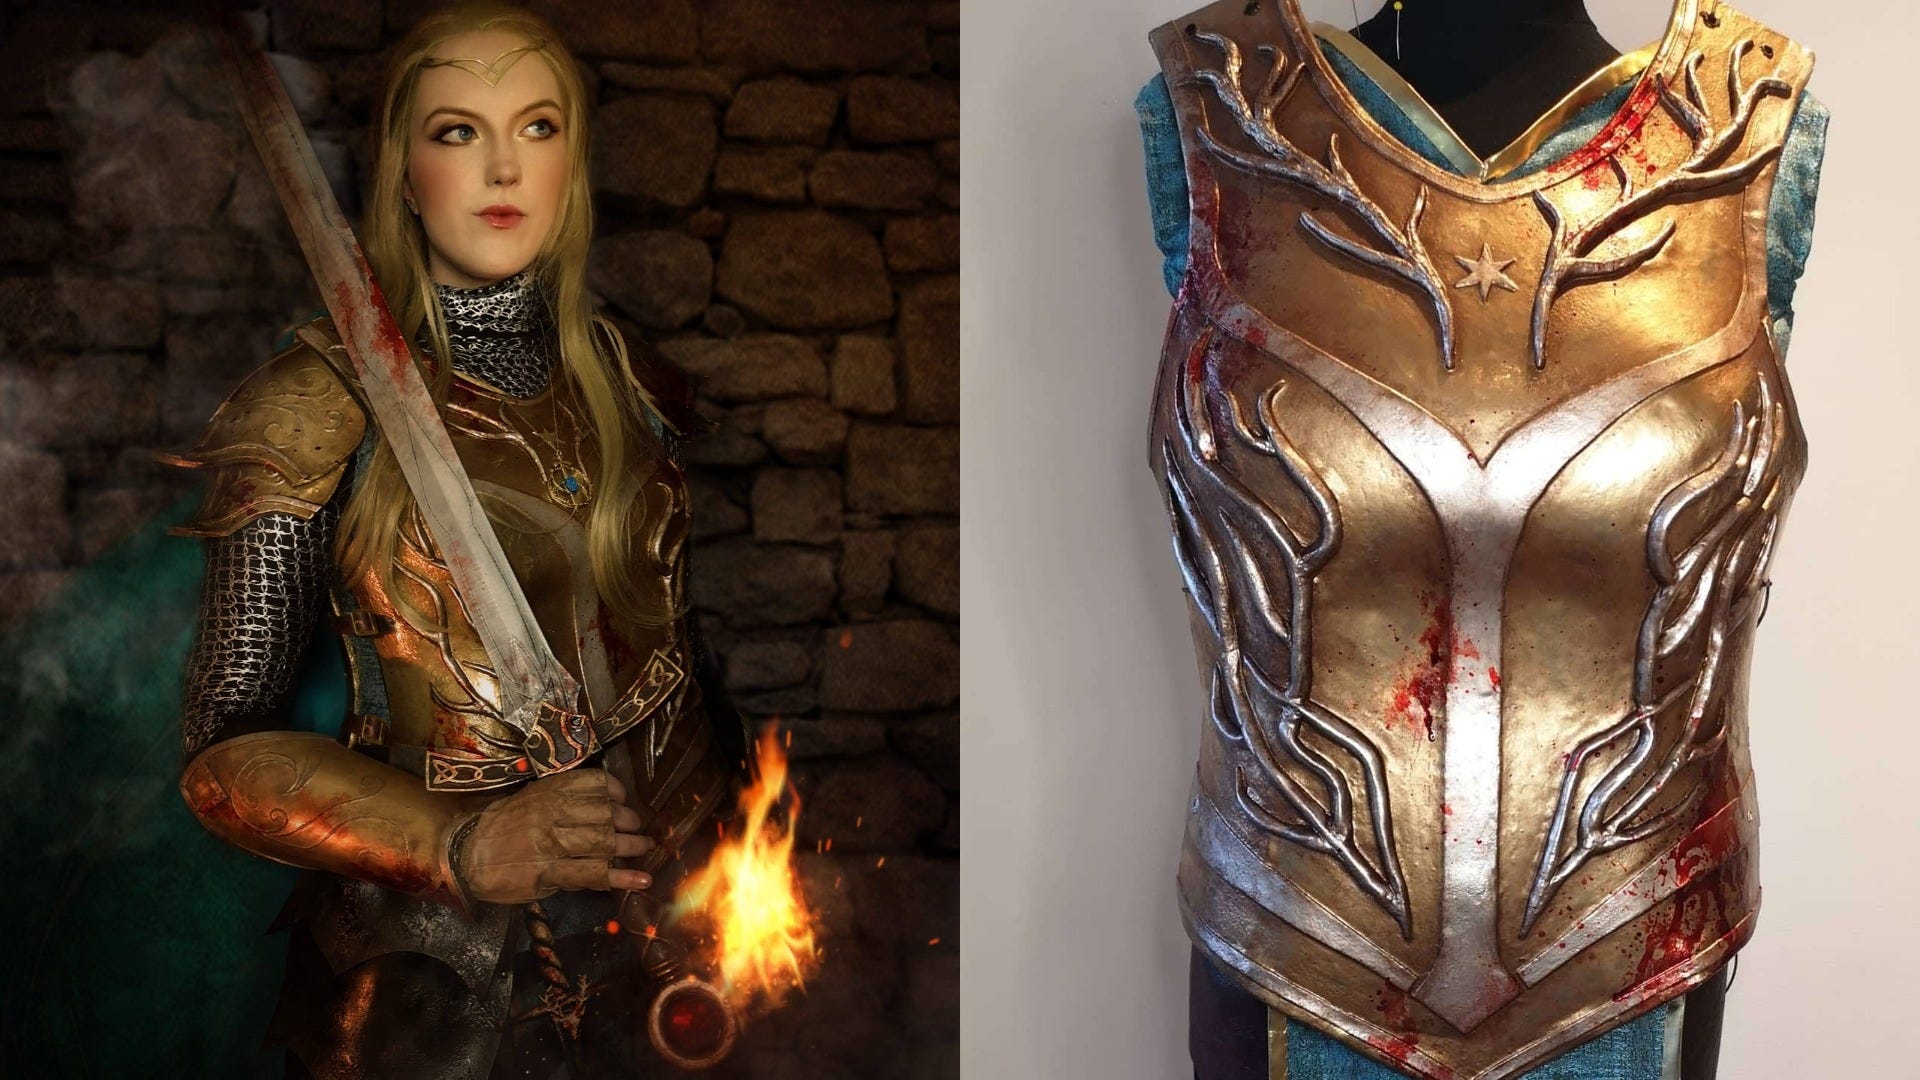

You’ve spent hours making your weapons and armor perfect, but the sad truth is that nothing stays new forever. This is especially true of fantasy characters, who spend most of their time stumbling from one battle to the next. Unless you are trying to replicate the look of someone starting out on their adventure, you’ll need to add some weathering effects to your precious props.
Blood stains and spatter are a great way to add a more visceral, gruesome feel to your cosplay, but it can be a nerve-wracking process while you’re still learning. Fortunately, here is everything you need to know about giving your props a lift by covering them in the blood of your enemies.
Remember that, just like there are a dozen ways to build the same prop, there are multiple ways to recreate a bloody look on your cosplay. The effect you choose will depend largely on your character and how the blood got there. Is it theirs or someone else’s? How long has the blood been there? Did it get there from the spray of a wound or was it wiped on the armor through direct contact?
The planning stage will inform everything you do after this and will help alleviate some of the fears about weathering your shiny, beautifully clean prop, so be sure to give it as much time and thought as you need.
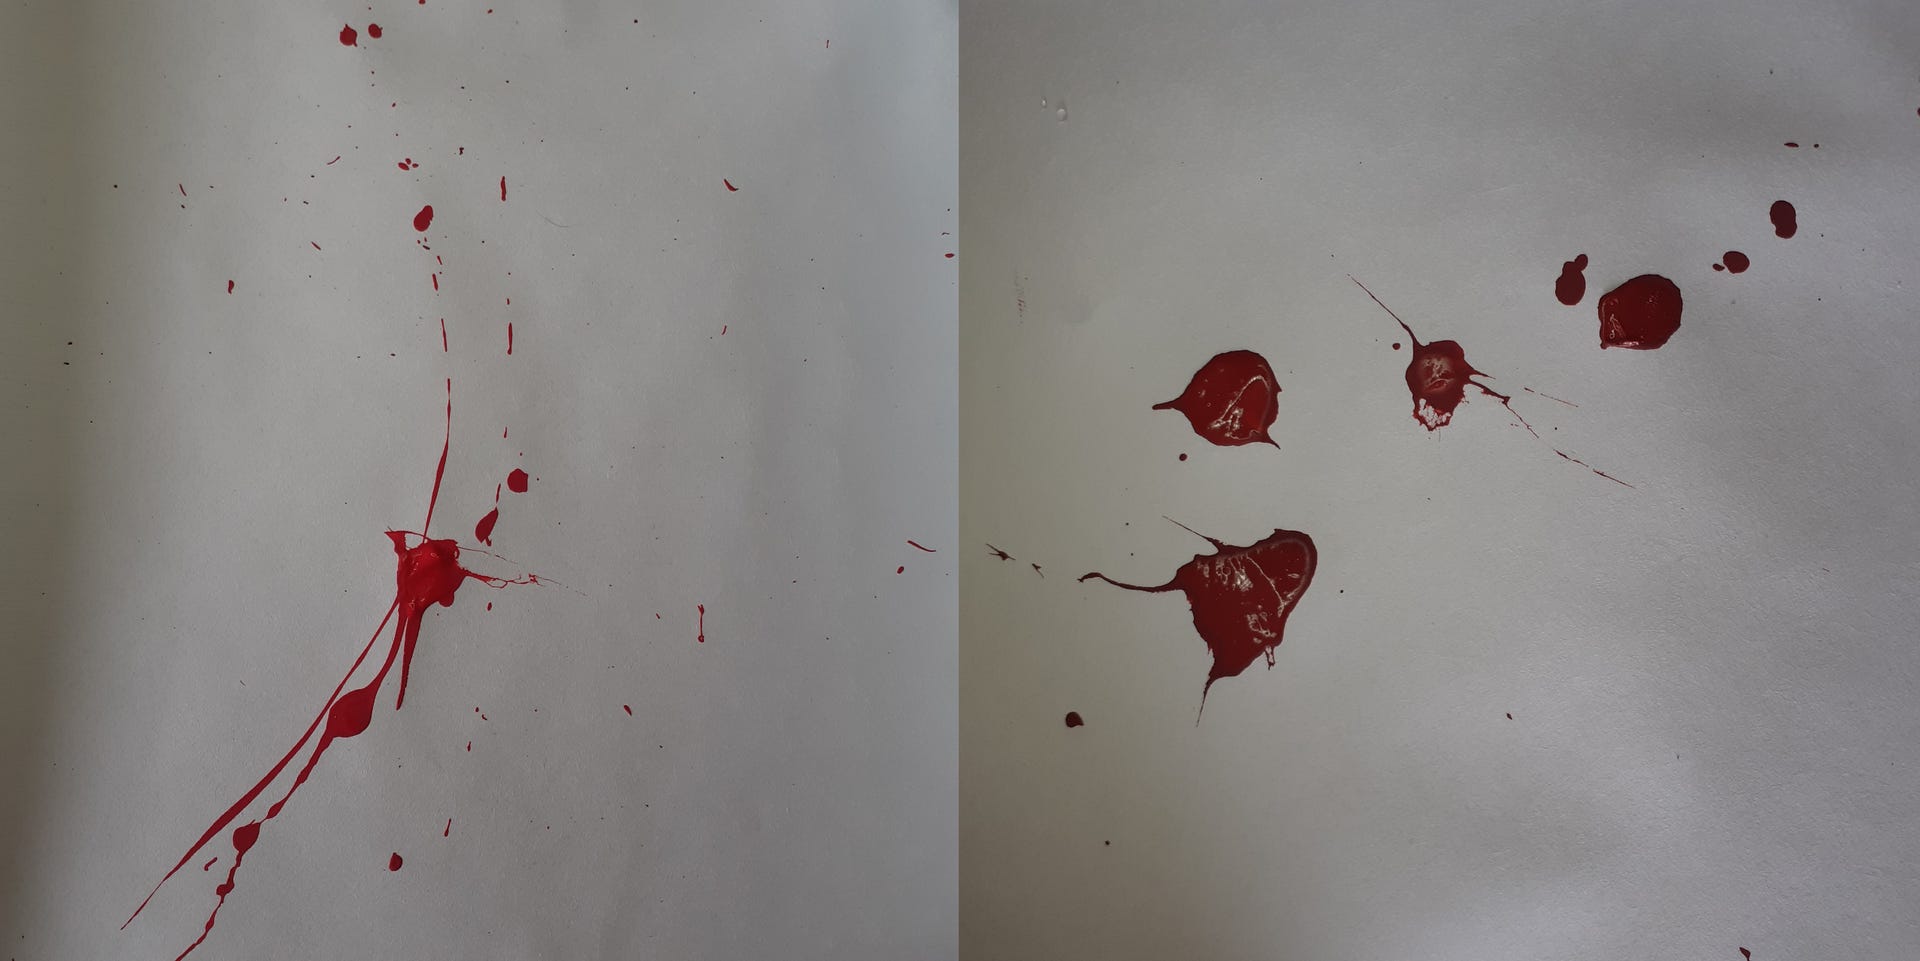
Technique One: A Light Spray
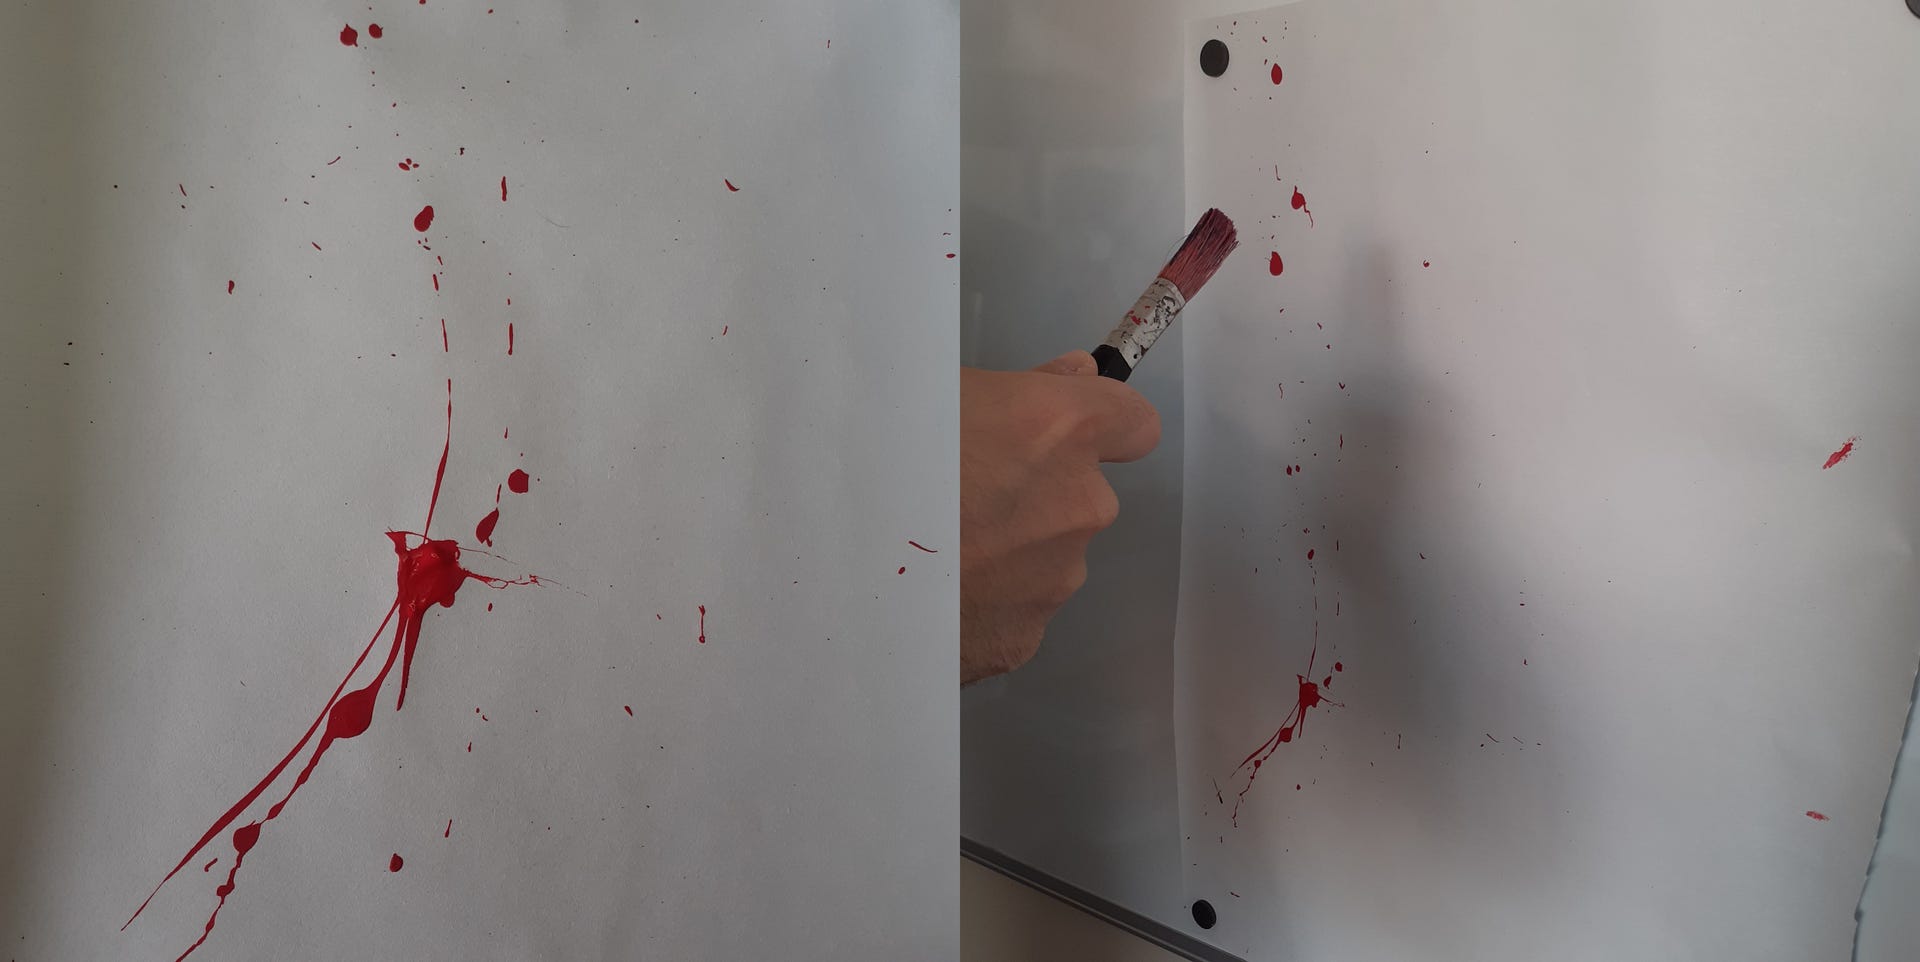
For a less gruesome, lighter effect, you can give your props a few accents of blood to hint at battles past. This can be achieved by collecting your chosen paint on a long-bristled brush and flicking the brush toward your prop with a whipping motion in your wrist several inches from the intended surface. You can also hit the handle of the brush onto another paintbrush or even a pair of scissors. The sudden stop will fling the paint forward and create streaks of blood across your weapon or armor.
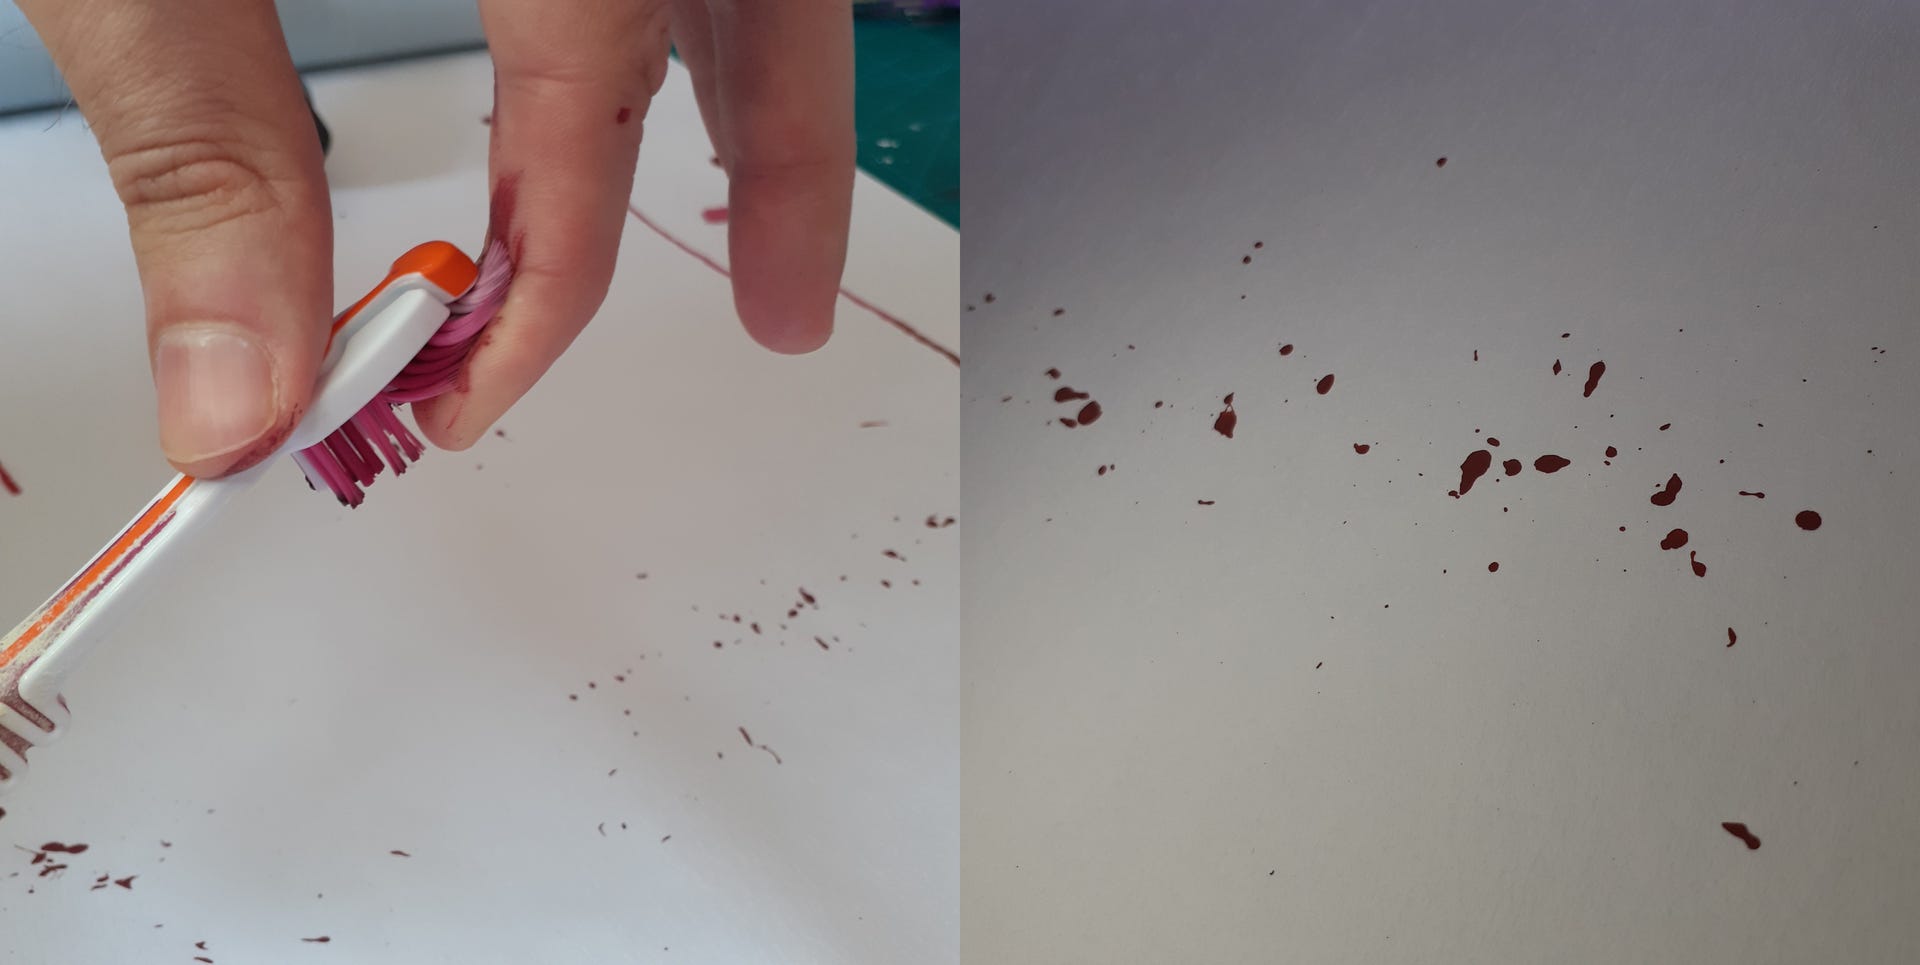
This technique is good for creating a chaotic spatter of blood across your prop, emulating the effects of a weapon striking an enemy. For a different effect, use an old toothbrush rather than a paint brush, which will create an even lighter spatter. Just be sure to keep the direction of the spatter in mind and practice ahead of time so you can get the exact look you’re going for.
Technique Two: Bloody Drips
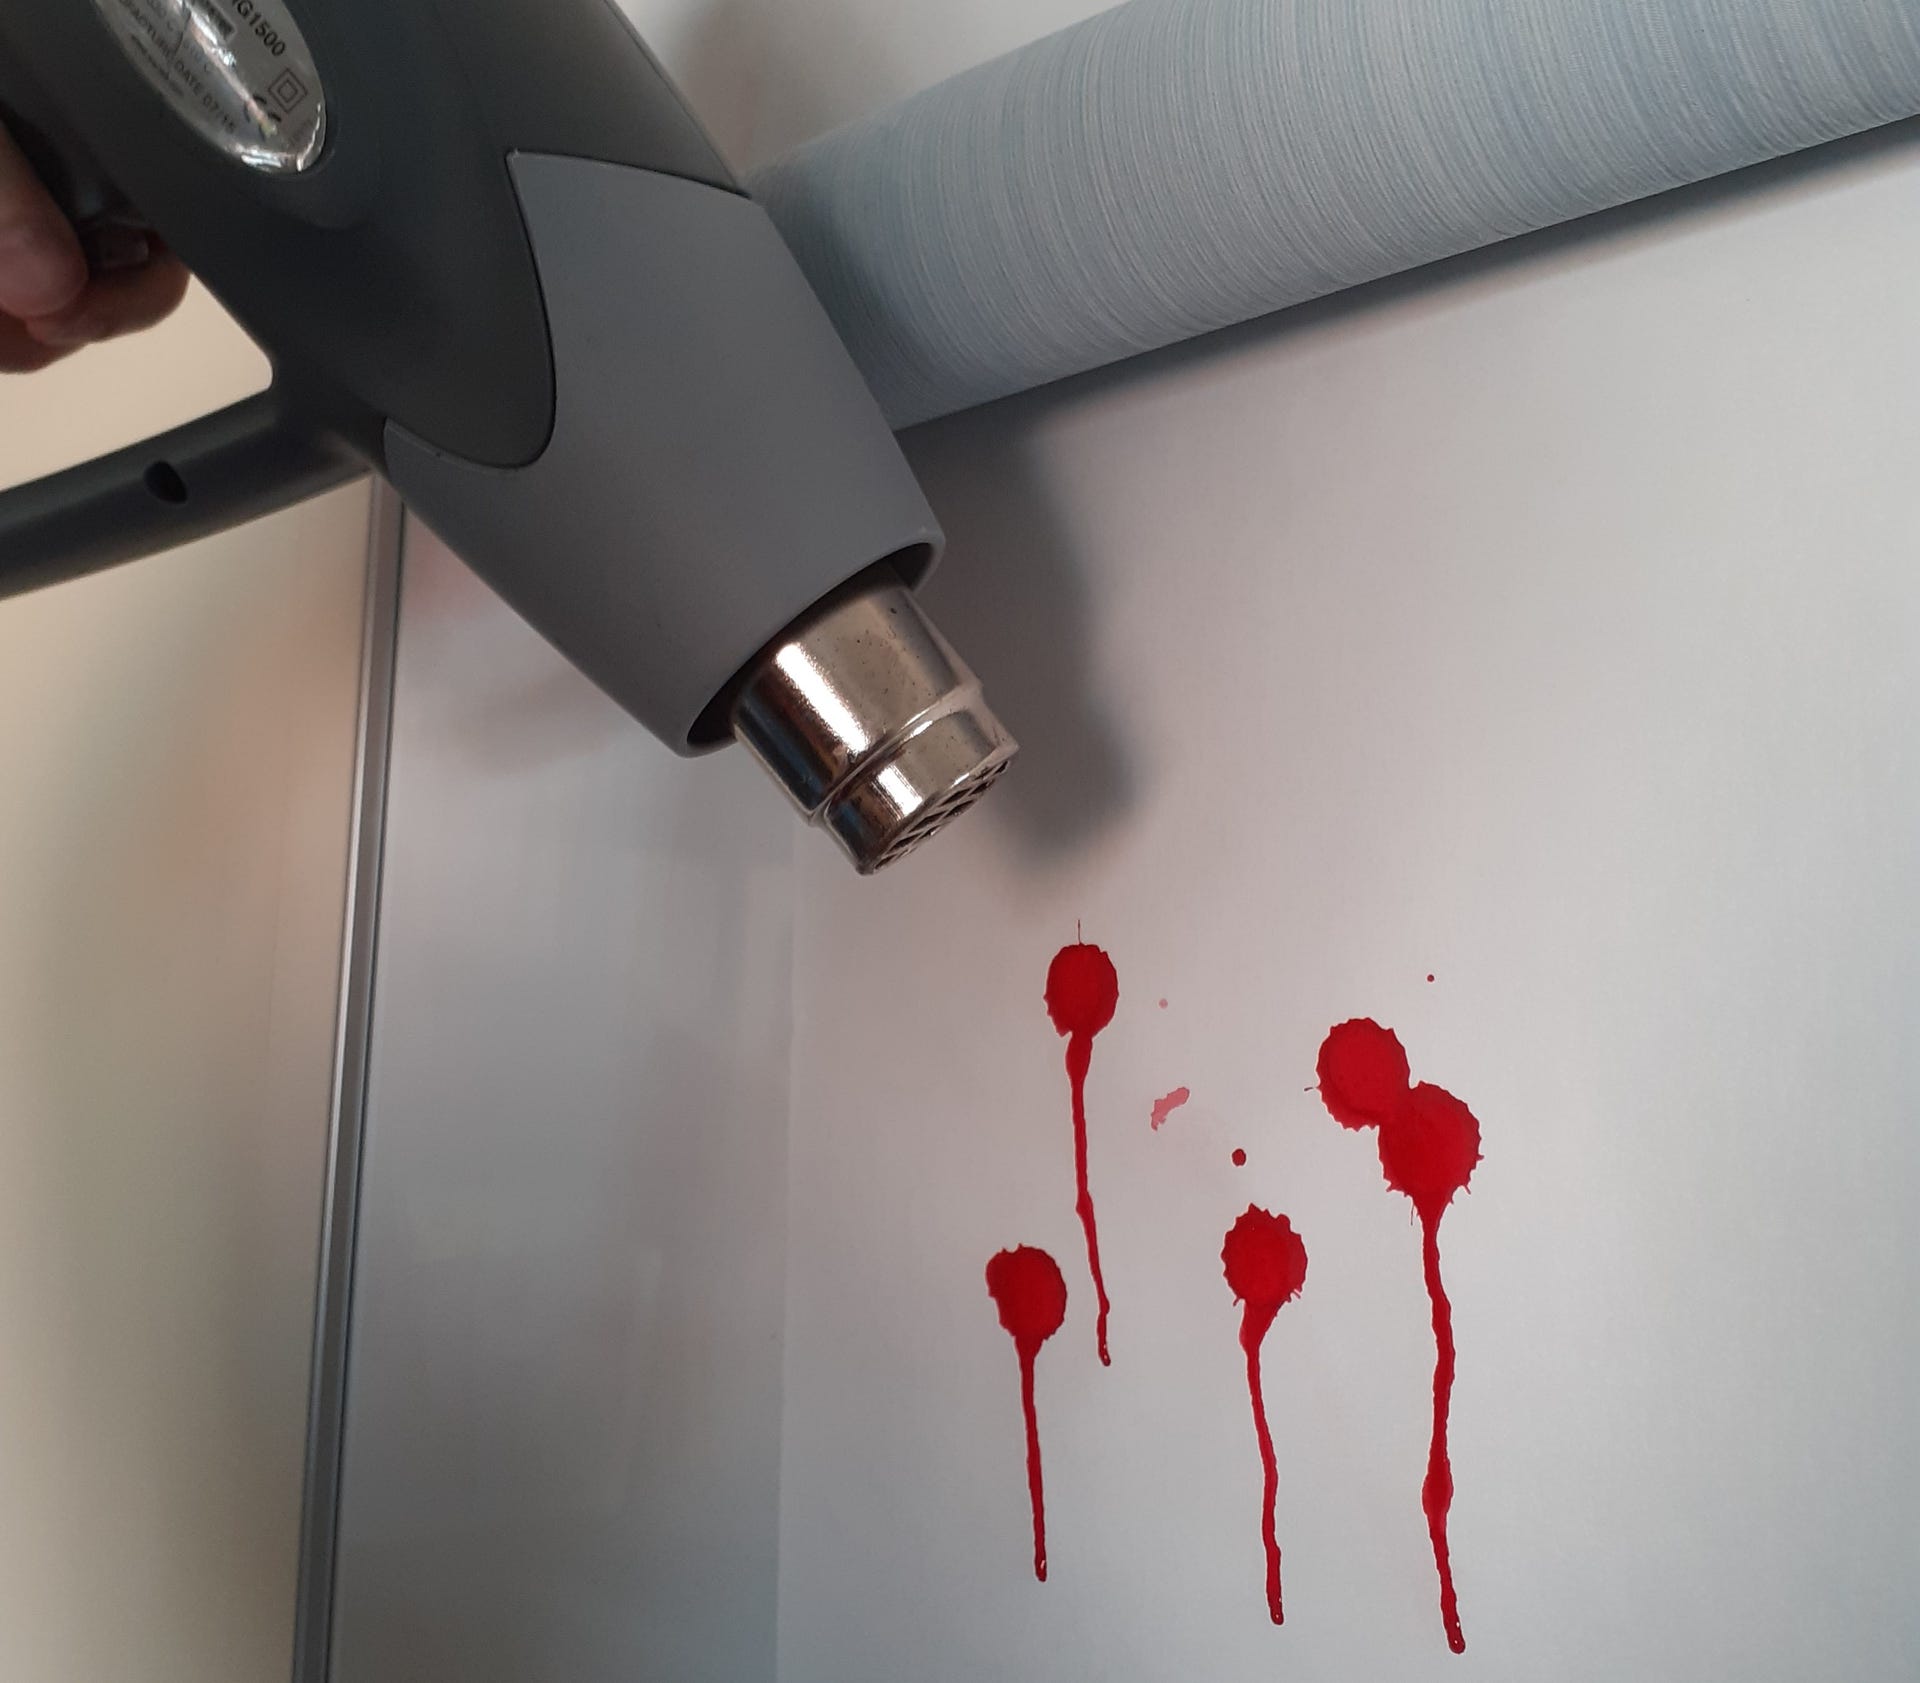
Sometimes blood may drip directly onto a prop. For instance, if your character has a wound on the side of their head, drops of blood may hit their shoulder. You can emulate this by letting gravity do the work for you. Get some watered-down paint onto a brush and hold it over your prop, allowing the paint to drip downward. The impact will not only create that a circular drop but also the natural spatter around that drop. Just be sure to darken the paint a few shades before you add the water to compensate for the change in color.
To make the drip run down the surface of the prop, hold it vertically and give gravity a helping hand with a hairdryer or a heat gun on a low setting. Practice until you get it right and then apply it to your prop.
Technique Three: Direct Contact
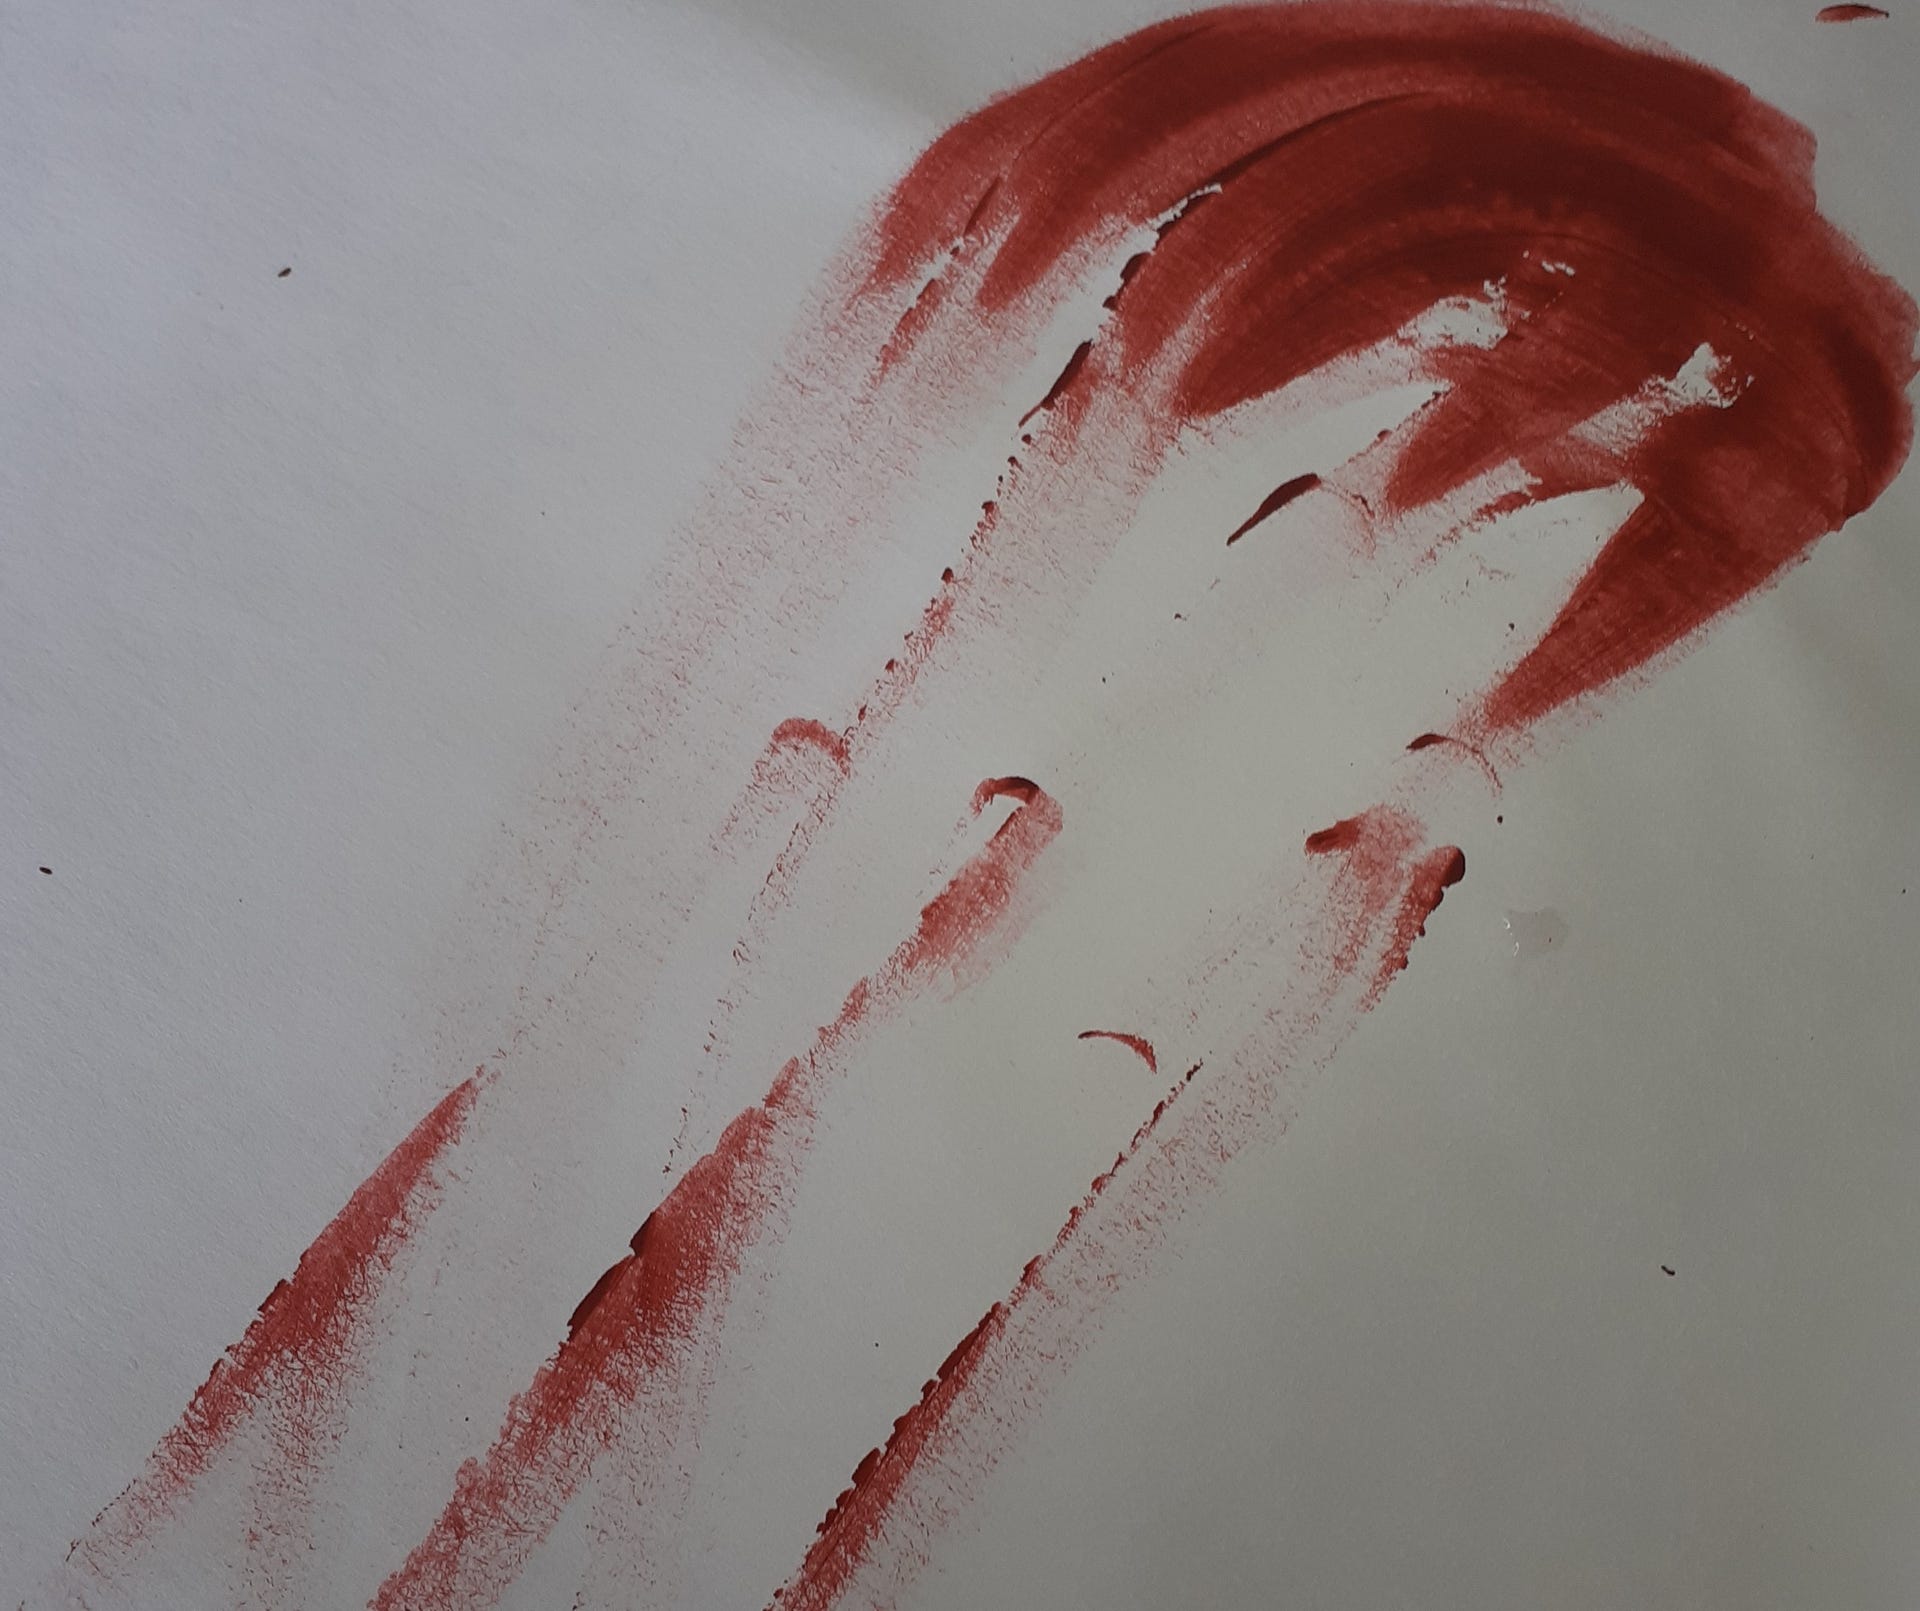
The edge of a blade cuts into an enemy. A bloody hand smears against a breastplate. Sometimes blood is wiped against a surface directly. The best way to emulate that is to get your hands dirty. Use your own hands to smear the paint across the surface. Start small and build up, keeping some cloth nearby in case you need to quickly wipe away an errant smear.
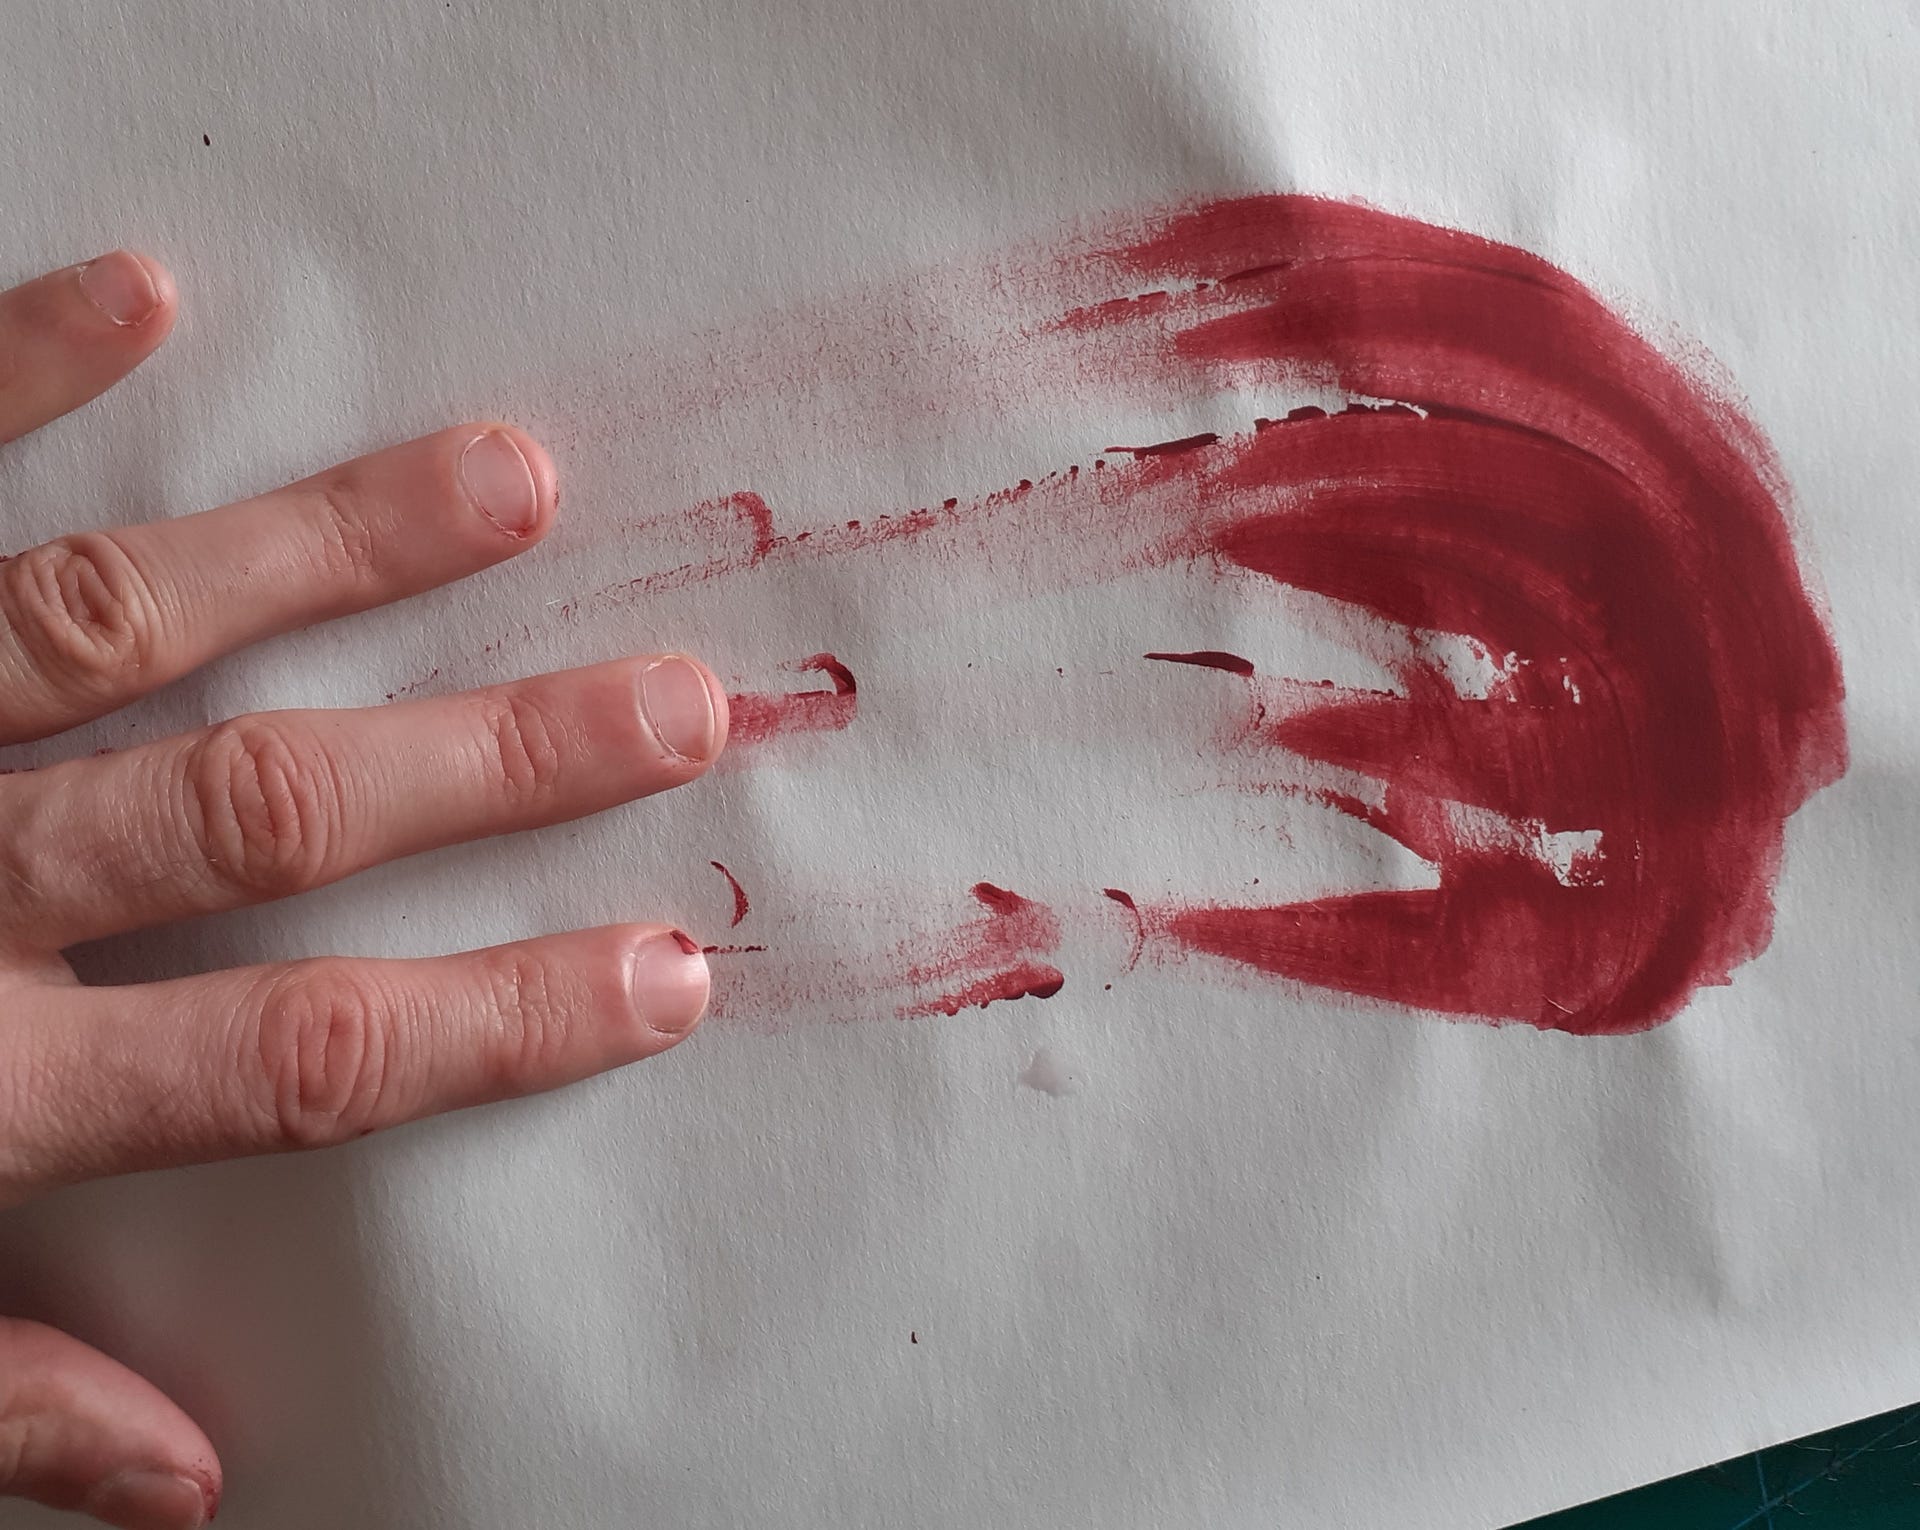
Remember that in a fight no one is stationary, so that bloody hand will drag across the surface of armor rather than leave a clear print. Don’t be squeamish and get stuck in!
Technique Four: Old Blood
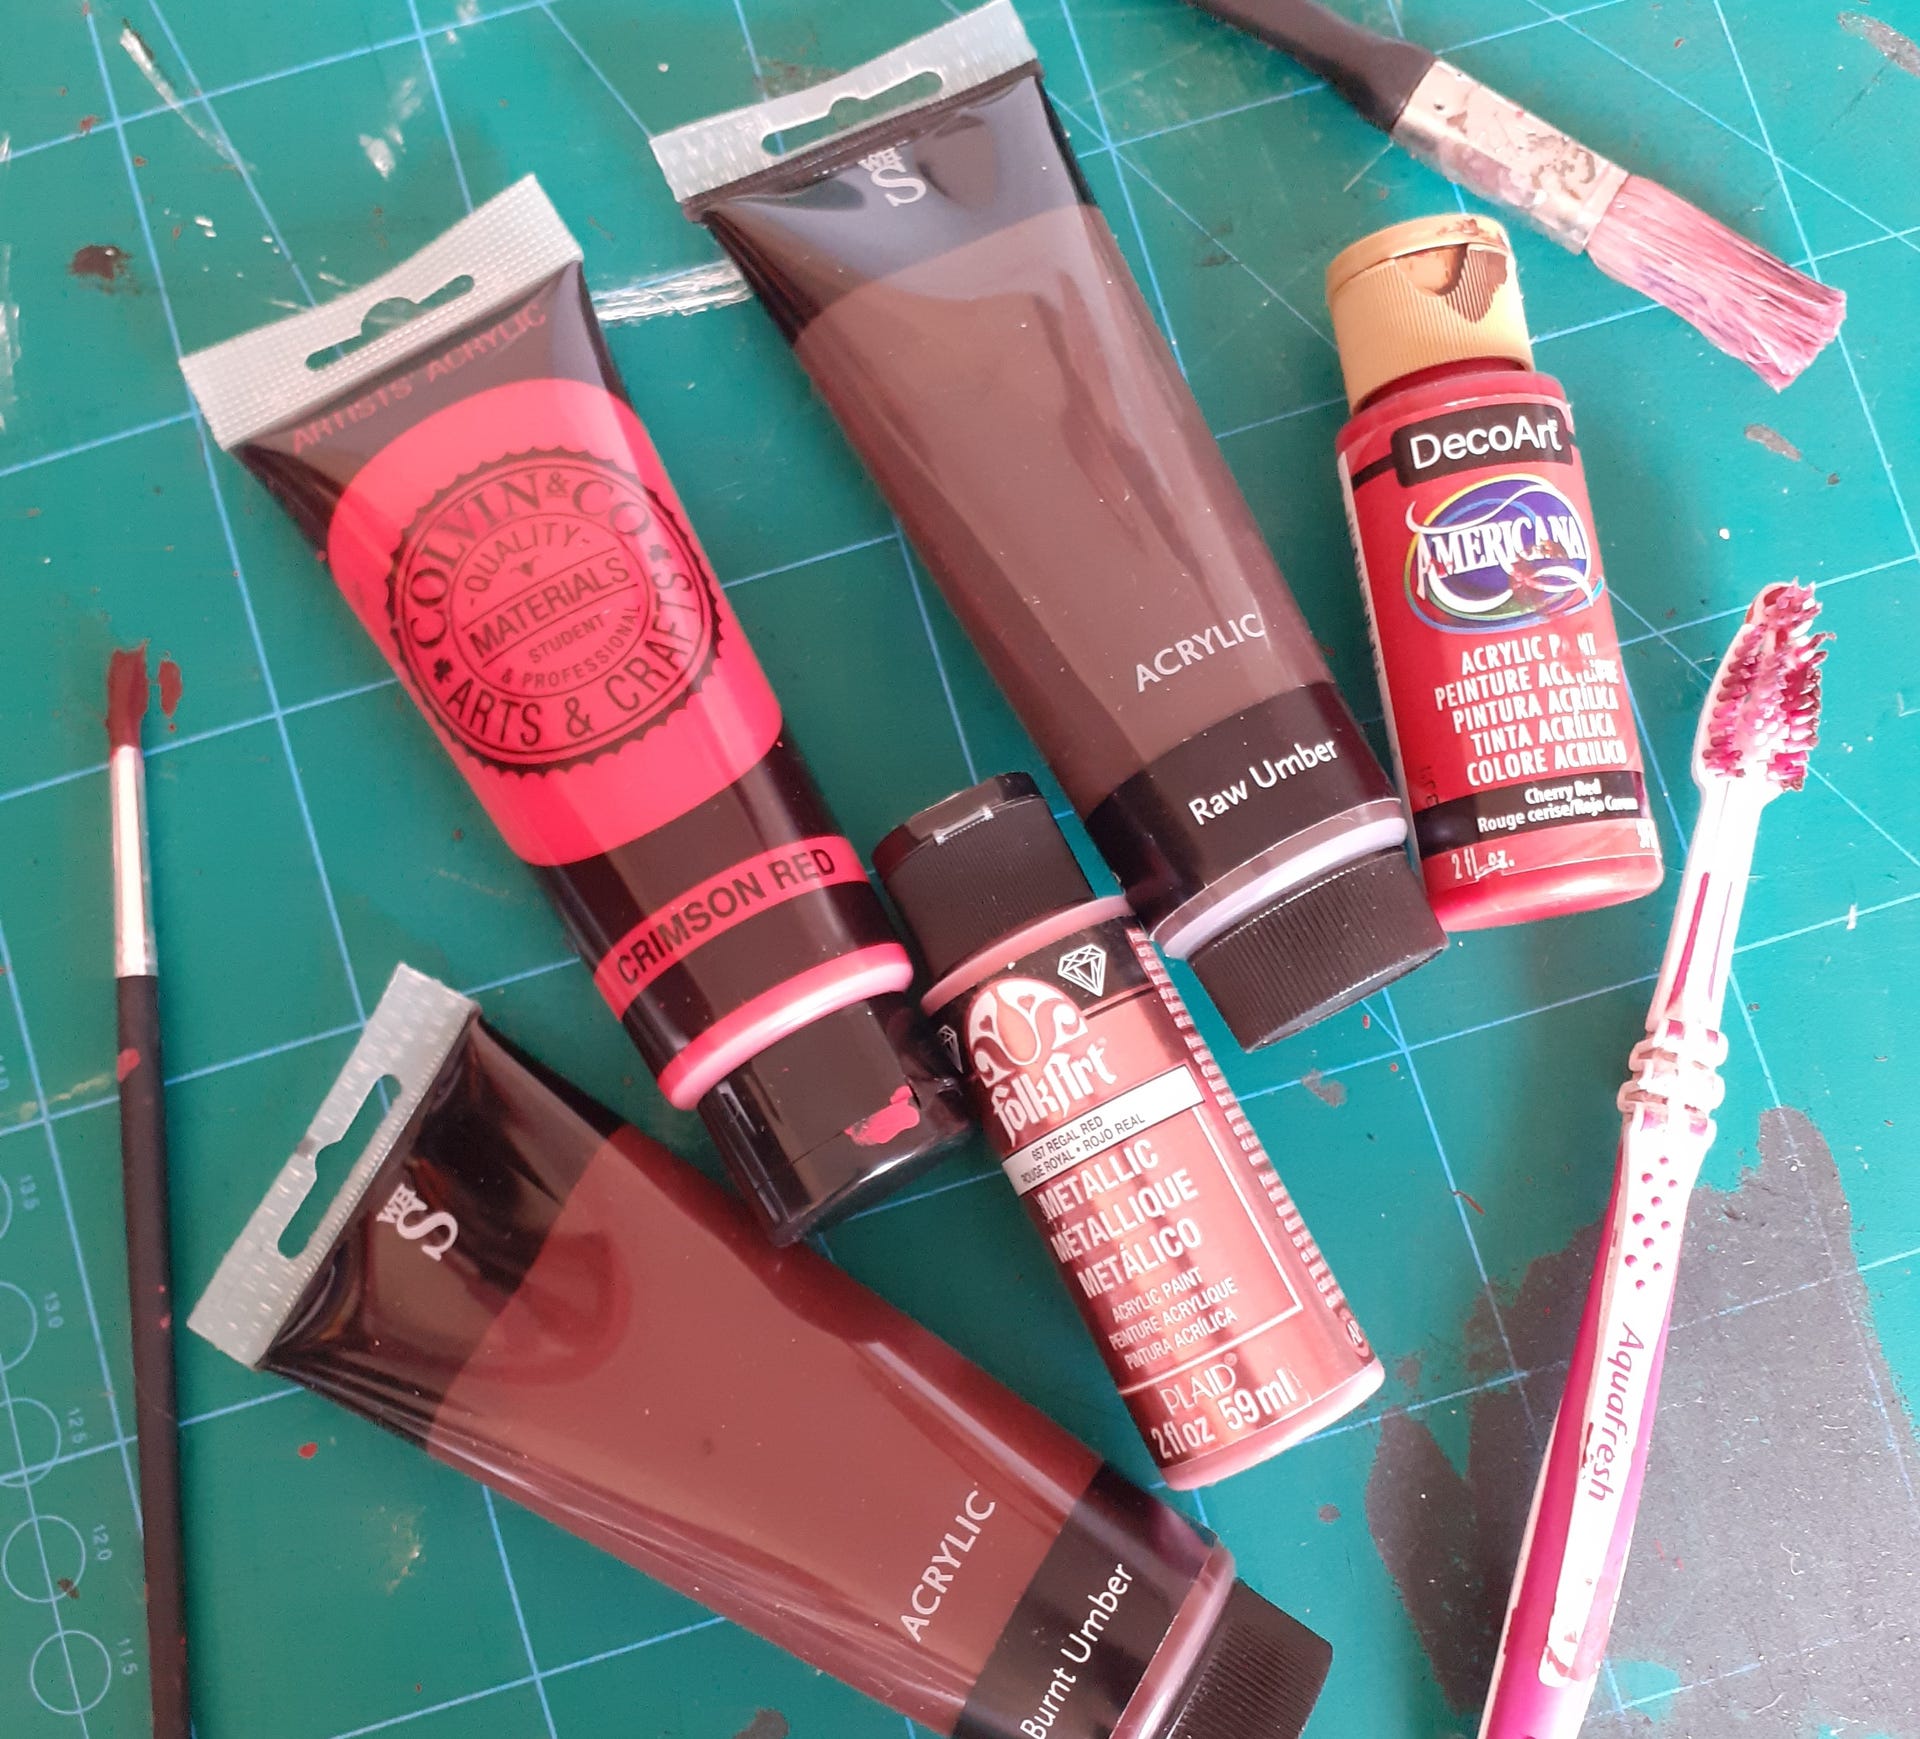
Despite how we think of blood, it isn’t always a bright vivid red. That works for fresh blood, but as it dries, it goes more and more brown, so choosing a color that works for the effect you’re trying to emulate is key.
For fresh blood spatter, I use a red acrylic paint.
The older the blood, the darker you’ll want it to be. I mix in a bit of black and brown paints to the red until I get the shade I want.
If you’re going for a more permanently blood-stained effect, I suggest erring closer to brown lightened with a touch of red mixed in.
Remember that you can combine these, with some blood looking fresher and some looking more dried and aged. Be sure to test your paint and let it dry so you can see the final look before you apply it to your prop.
Combining all these techniques and different shades of paint will give you a used, battle-worn look to your weapons and armor worthy of the best warriors.